This document describes the standard testing procedure for testing vape's compatibility with FRIENDS v1 monitor
Standard operating procedure of vape testing
INTRODUCTION AND PURPOSE:
This Standard Operating Procedure (SOP) following procedure describes testing that determines if puffing on a certain vape model is detectable by the FRIENDS device.
MINIMUM EQUIPMENT REQUIRED:
- Fully charged vape.
- Fully charged FRIENDS.
- 8mm grid printed on transparency paper
- A Vacuum pump/line for simulating puffing.
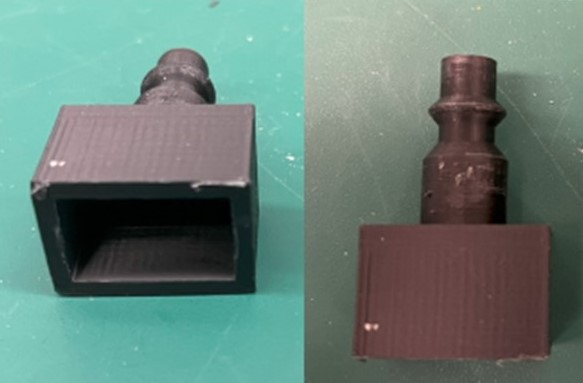
- 3D printed mouthpiece adapter.
- Putty for sealing vape mouthpiece and vacuum line joint.
- Protective gloves.
- Copy of checklist for documentation.
Note: All procedures below must be performed while wearing protective gloves. At the end, clean the work area from any leftover debris.
PROCEDURES:
1. Charge the vape: Ensure the vape is completely charged before conducting tests. Mark the status in the checklist.
2. Charge the FRIENDS: Use a micro-USB cable and a USB charger to charge the FRIENDS. A blue LED light will remain on while the device is being charged. The blue light will go off once the charge is complete. Mark the status in the checklist.
Note: The FRIENDS should be inside the enclosure.
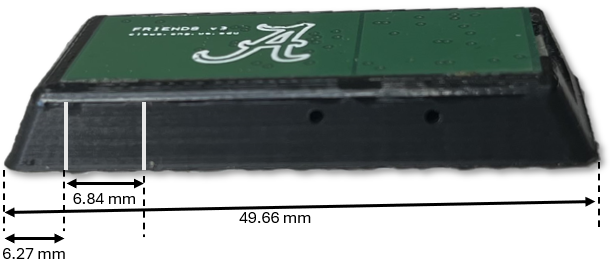
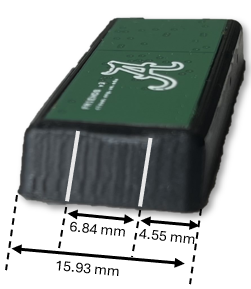
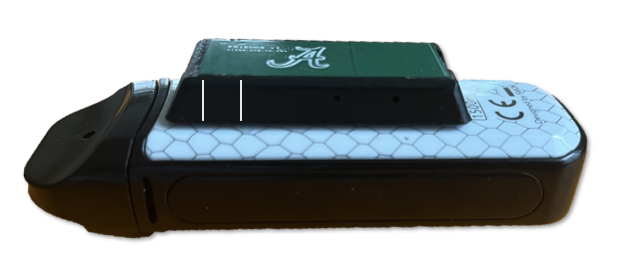
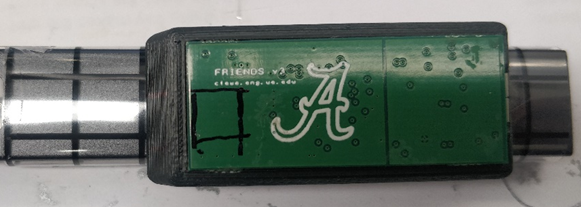
3. Mark the RF sensor location on the FRIENDS enclosure: Mark the location of the RF sensor on the FRIENDS enclosure. The process of locating the RF sensor on the FRIENDS enclosure is illustrated below.
 |
 |
 |
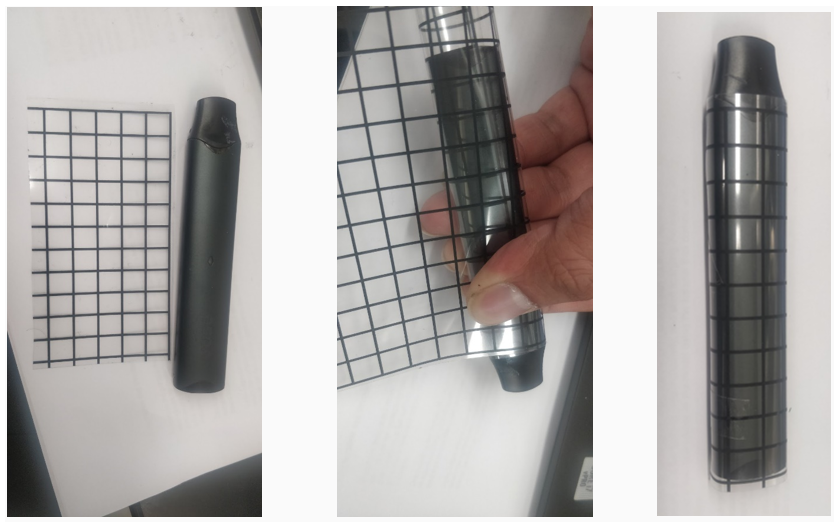
4. Wrap transparency paper on the vape: Wrap the 8 mm grid transparency paper on all sides of the vape. Click here to download the grid.
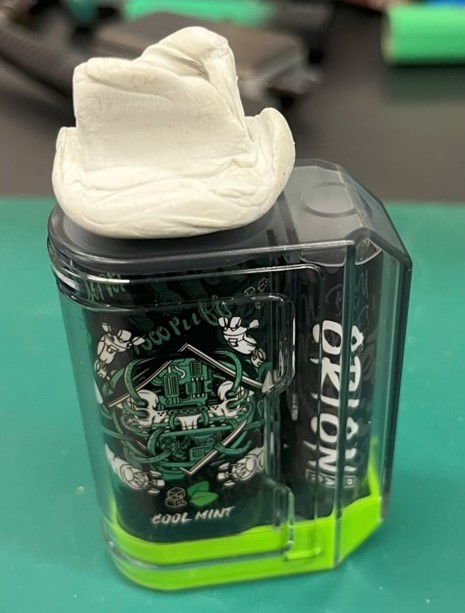
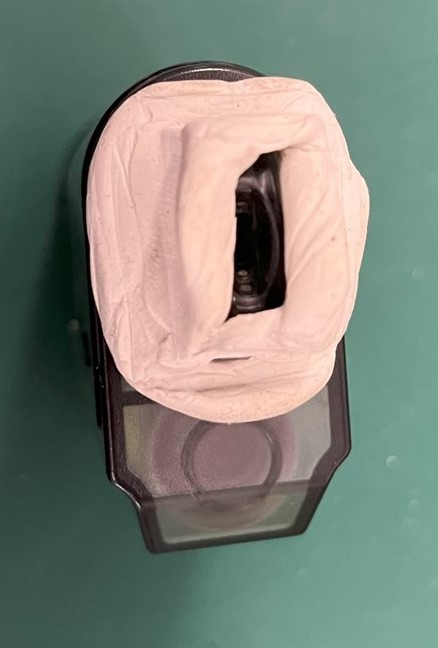
5. Wrap the vape's mouthpiece with putty: TWrap putty around the mouthpiece as shown below. Ensure the joint between the vape mouthpiece and the vacuum line is airtight. Use reusable mounting putty (such as Loctite Fun-Tak Low Strength Synthetic Rubber Mounting Putty). Mark the status in checklist.
|
|
|
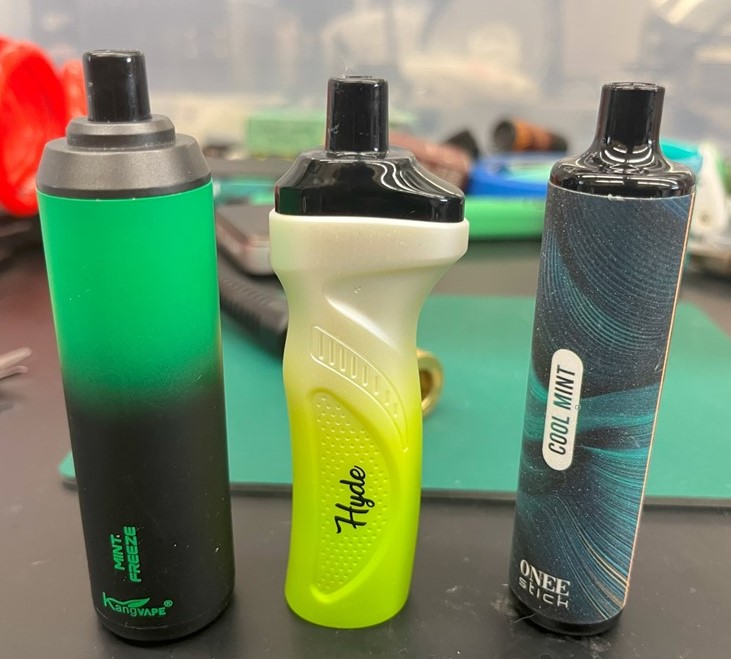
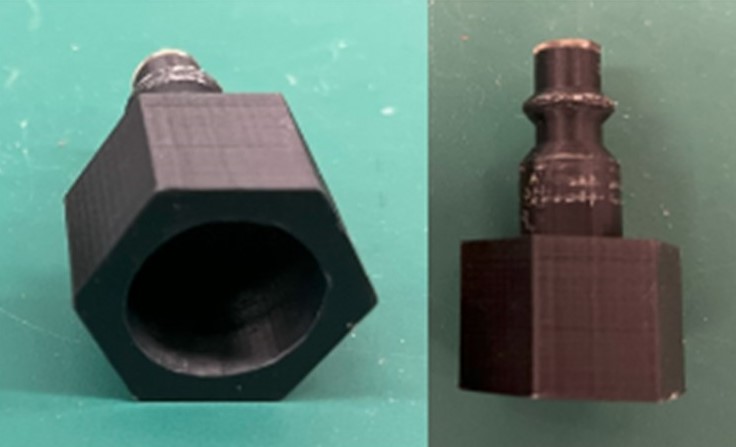
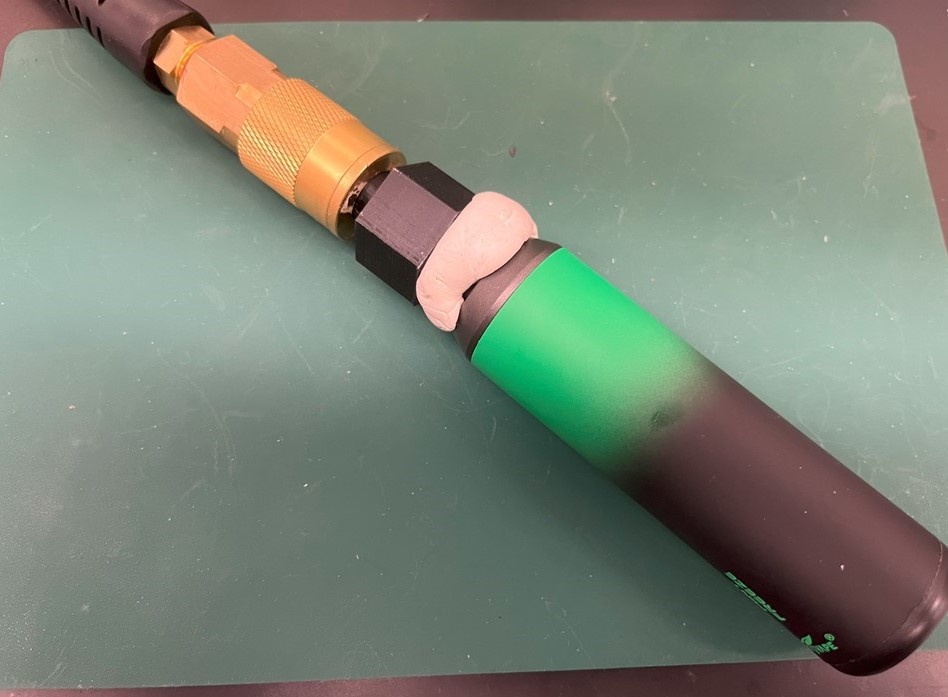
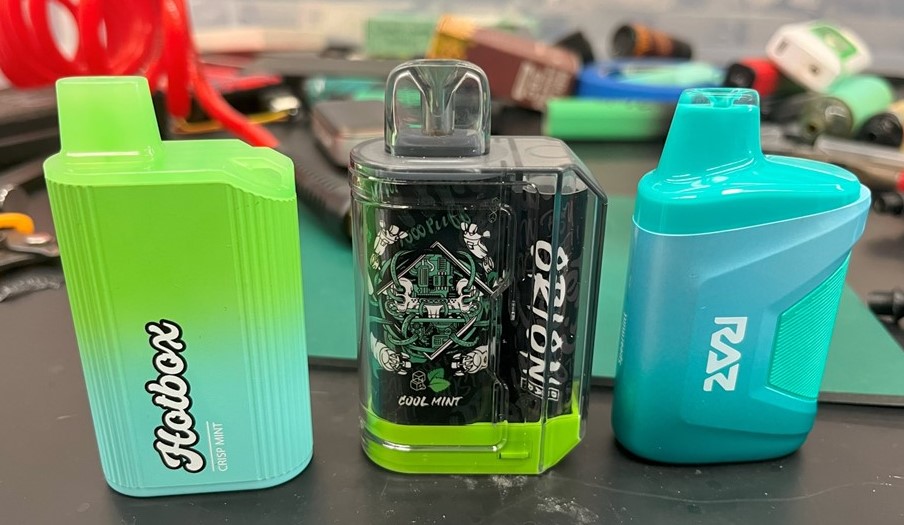
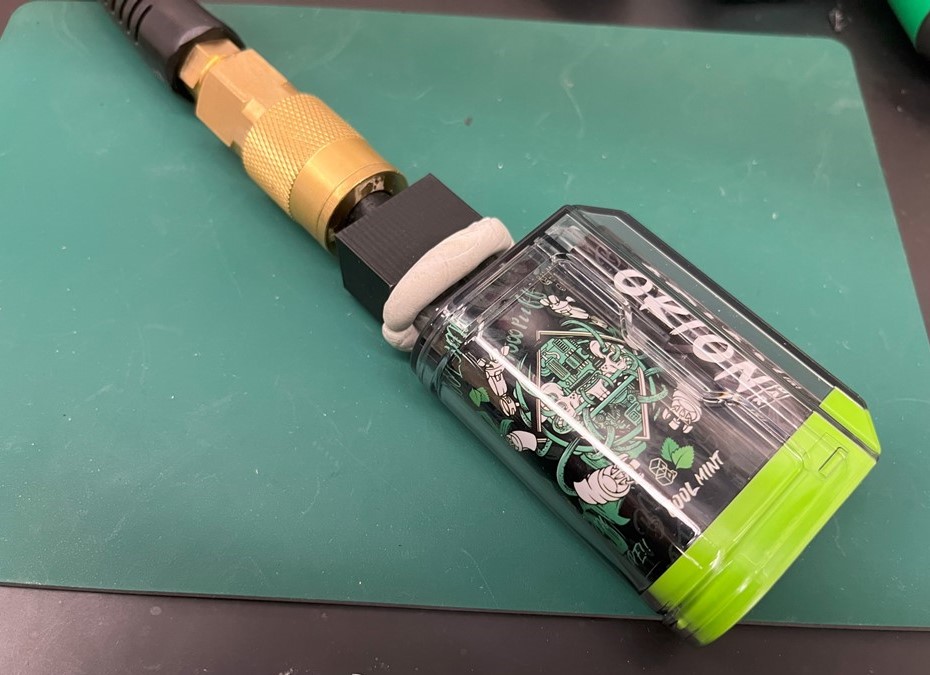
6. Attach the vape to the vacuum line through the mouthpiece adapter: Connect the mouthpiece adapter to the vacuum line and then connect the putty-attached vape mouthpiece to the mouthpiece adapter. Sample images and links to 3D adapter models are provided below. The adapters are designed to be attached to a standard air hose connector. Examples of vapes connected to a vacuum line are given below.
The vacuum is used to simulate puffing. The user should be able to control puffs either through a mechanical (e.g. foot pedal) or electromechanical valve.
|
Mouthpiece type |
Vape Sample |
Mouthpiece Adapter |
Vape connected to the vacuum line |
|
Cylindrical-shaped mouthpiece |
|
Link to the 3D model |
|
|
Box-shaped mouthpiece |
|
Link to the 3D model |
|
7. Identify the sensitivity zones:
a. Based on the grids on vape, select a side (front, back, right, left, or bottom), place the FRIENDS on top left corner of that side.
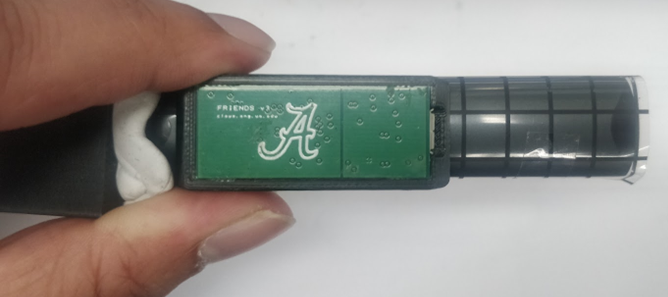
b. Initiate puff with the vacuum and very slowly slide the FRIENDS from top to bottom.
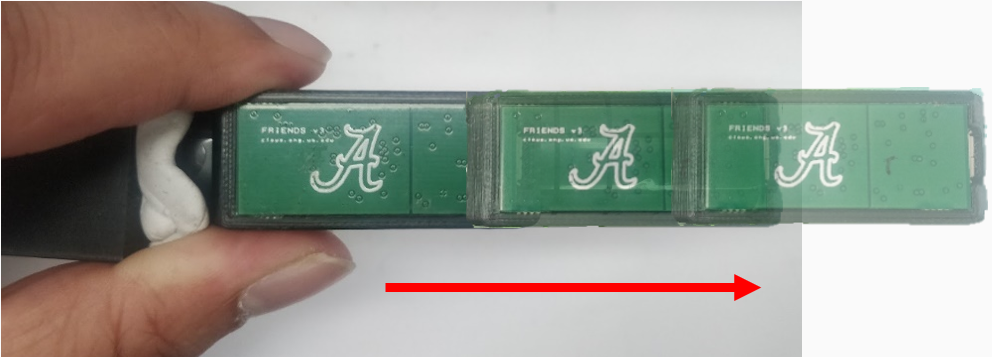
P.S.: Make sure the vape is on and puff is initiated. There will be light on the vape’s body to indicate the active state of the vape. For this vape, the indicator light was at the bottom. It will be different for different vapes.
DO NOT puff more than 3 seconds at a time. After puffing for 10 seconds in regular intervals, let the vape rest for 5 seconds and then start puffing again.
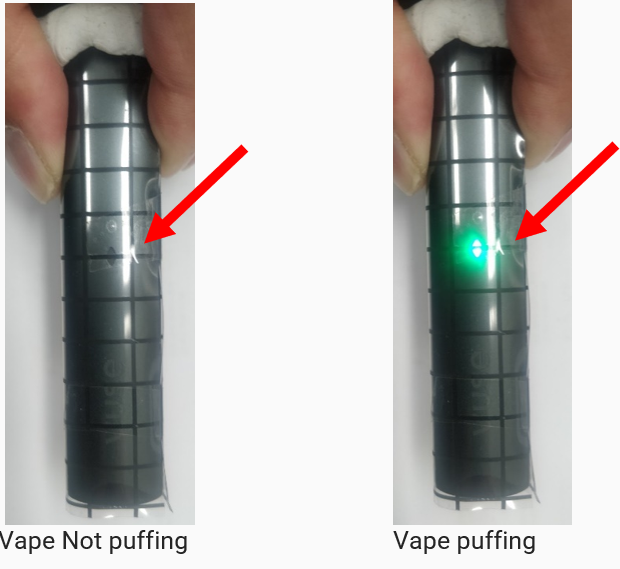
c. If the green LED on the FRIENDS device starts to illuminate, stop sliding. Initiate puff again and observe the green LED illumination. If it stays on during the whole puff, mark that location as “X” in the grid of the vape. This is a sensitive spot on the vape.
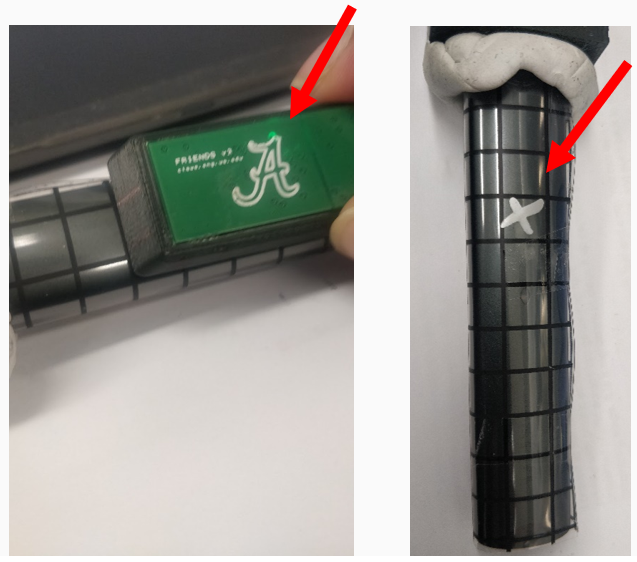
d. After marking the sensitive spot on the vape, start sliding the FRIENDS device again and complete the whole row.
e. Then place the FRIENDS on the middle of the vape and repeat steps 7b to 7d.
f. After finishing scanning this row with FRIENDS, go to the next row and so on.
g. In this way, the front side of the vape will be scanned for sensitivity zones and the grid on the vape will be marked with the “X” symbol if the vape is sensitive to FRIENDS device.
h. Then place the FRIENDS on another side (e.g. front, back, right, left, or bottom) of the vape and start scanning again. Repeat steps 7a to 7e and populate the documentation table.
i. Finally, after completing scanning all the sides of the vape, take a picture of each side of the vape. Then insert the images in the checklist document table.
j. If there are multiple sensitive zones, select a possible FRIENDS mounting location based on signal strength and usability.
k. Take a picture and insert it at the end of the checklist documentation.
For downloading the checklist of essential steps for vape testing: Click here


